Search This Blog

Monday, October 31, 2005


No quilting again yesterday because we had a big family dinner so I spent most of the morning cooking and all afternoon and evening visiting. This morning, because I still had no yellow thread I couldn't work on the quilt, so I made a quilted bag from one of the squares I decided not to use on the quilt. The bag looks nice but it's pretty big. Much too big for me but then I am not that tall.
This afternoon I went to town and got the thread and a few more yards of fabric at M&A at half price. Their quilting fabric is going fast.
Tomorrow it will be back to the big project!

Saturday, October 29, 2005

I took the day off from quilting yesterday to do some silk painting with Heidi Hunter while the guys tramped the bush in search of who knows what. The silk painting was very successful and we are planning more art dates.
Today I started stippling the current quilt but ran out of yellow thread. When I went to fill the bobbin with the second spool I had bought, I realized it was hand quilting thread in the same color. That wont work on the machine at all so I am at a standstill. Too bad I didn't run out yesterday because I went to town this morning for groceries and could have easily picked up some thread.
Oh well, more time to finish binding the antique fan quilt that I have finally finished hand-quilting. I have about one yard to go. I also have a Double Wedding Ring top that has been pieced but not quilted so I guess that will be my next big hand project. I will have to dye some fabric for the back and decide on how to quilt it. Such tiny pieces demand a lot of quilting I suppose. Hmmm...

Thursday, October 27, 2005


Today was decision time. How to quilt it. I thought I could do one of three things. I could stitch in the ditch on all the lines and end up with many small squares on point. I could stitch in the ditch on the lines of the stars and around the edges and then stipple the yellow part. Or I could sew concentric circles starting in the middle of the stars. When I tried it out on Corel Draw over a picture of the quilt the last option seemed the best. I was about to start marking the quilt when I thought I had better try at least the last two options on a spare square. Luckily I had a couple of them that were slightly smaller from when I was going to have several sizes of stars instead of just large and small.
When I put the two squares up on the design board, it was clear that the stippling option was the best by far. Not that my stippling is that accomplished, but since I found out about the half way setting on the presser foot of my new sewing machine, it works a lot better. Hopefully, the centre of the quilt which I will stipple before adding the borders, won't be too cumbersome for my machine. Oh for the new Pfaff quilting frame!


Now I am at the unpleasant stage of crouching on the floor doing the pinning. I need sides that fold down on the side of my table so I can use it for pinning large quilts. So the next few days will be spent stippling or meandering if I can't get the pattern fine enough to call it stippling.

Tuesday, October 25, 2005


Here is the main part of the quilt pieced together. Now I have to decide on a backing color because I think I will quilt this part and then add the borders and quilt them later.
I have cut 8 yards from my bolt of unblocked cotton and serged the edges so they won't tangle in the machine when I pre-wash it to get out the sizing so the dye will take.


This is my dyeing area near the door of my studio. As you can see, it's not the cleanest area but so much fun! So far I have been doing low-water immersion dyeing with Procion Dyes from G&S Dyes in Toronto.

Monday, October 24, 2005


Now I realize that I should have applied the small stars before sewing the large ones together. I have spent the morning ripping back the corners, figuring out exactly where to place the red triangles and then sewing the corner back together. With all those bias seams, I have found spray starch to be my best friend. So many corners.
I also noticed a bit of a problem with the negative spaces but with a bit of help from Marcel, was able to get them looking balanced. Note to self: Think more about negative spaces on the design board. Don't wait till they are sewn together.
Still thinking about the blue border. I may want some small stars there too. Will I make them set into blue backgrounds the way I did with the yellow, or will I machine appplique with yellow or gold satin stitch??

There, one more corner done.

Sunday, October 23, 2005


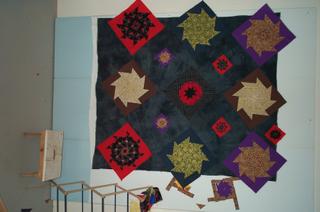
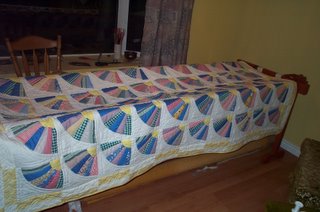
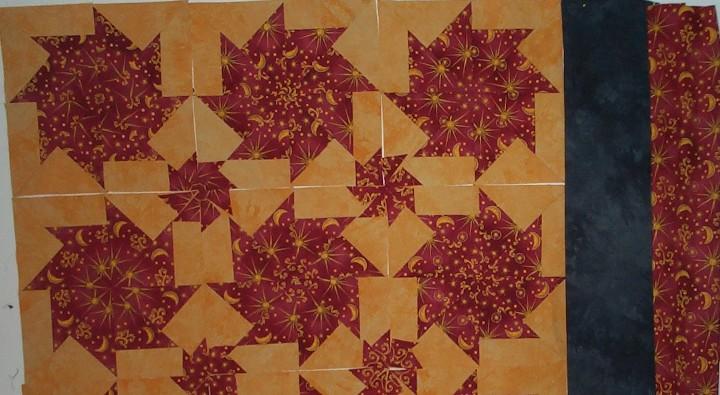
Here comes quilt number five. This one has gone through a lot of changes. I heard about Bethany Reynold's Stack and Whack method but didn' t have her book. I found a site online that vaguely told how to do it so I tried it out. Here's what my first attempt looked like. Then I went to a quilt show in Winnipeg and saw a couple of Kaliedoscope quilts, which is what this pattern is called. I noticed that they used the same fabric for the kaleidoscopes and the same for all the backgrounds. It makes for a much more cohesive look. So these squares are all consigned to the "to make into shopping bags or pillows later" pile.
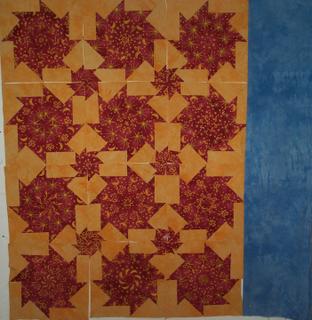
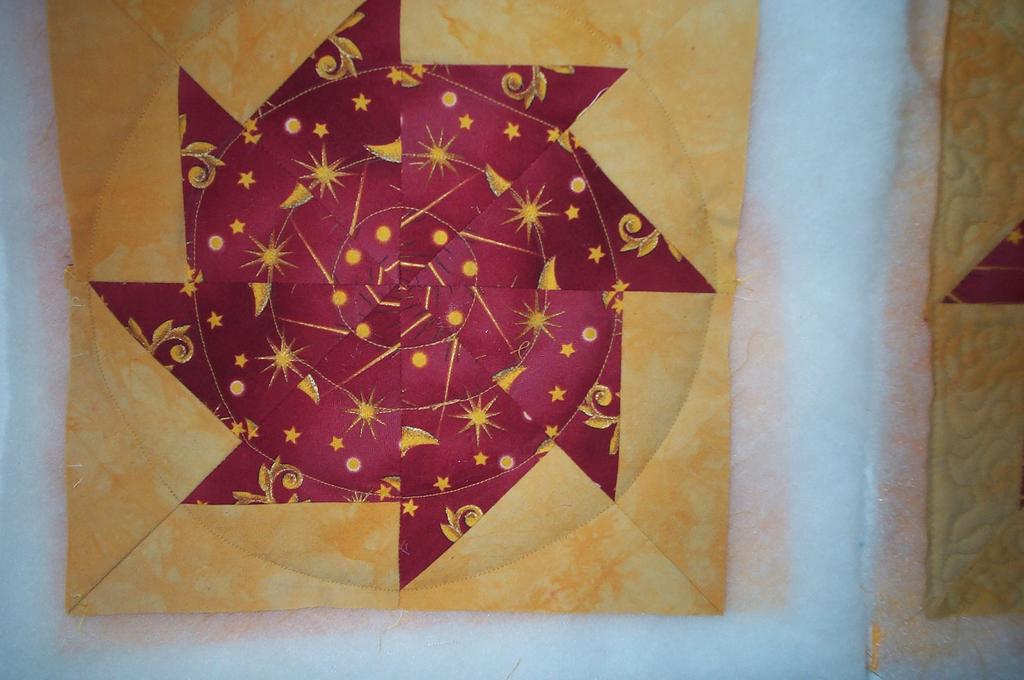
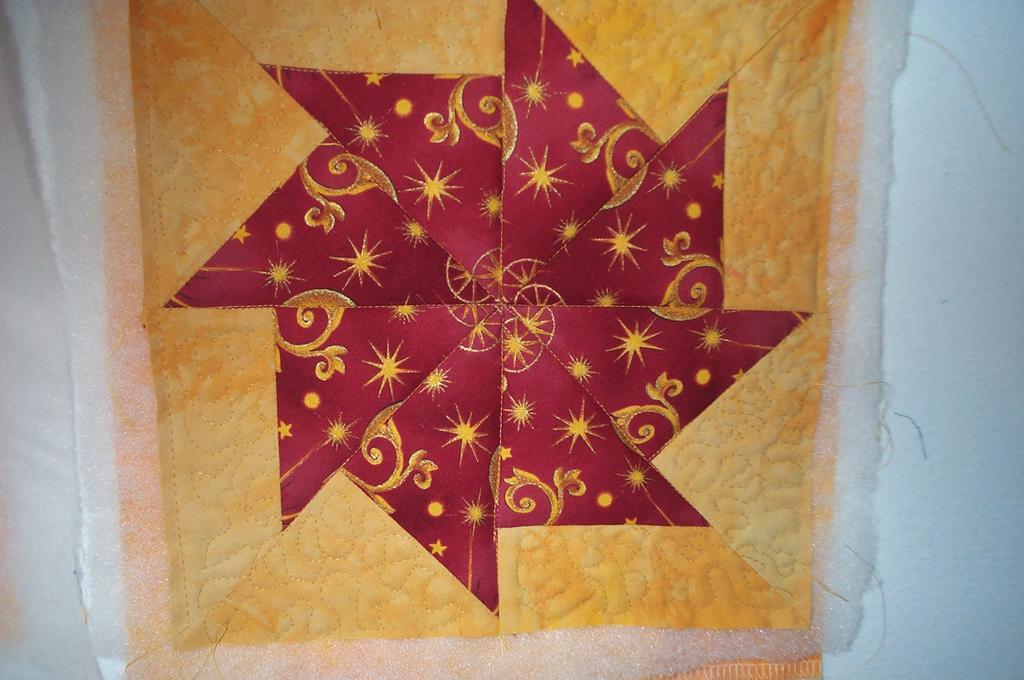
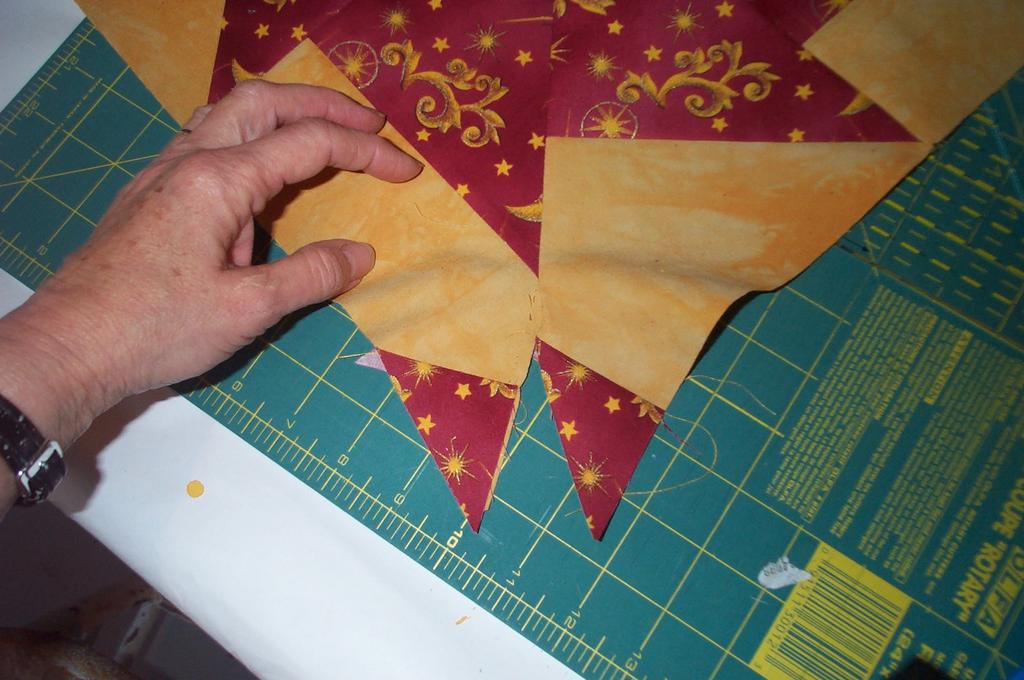
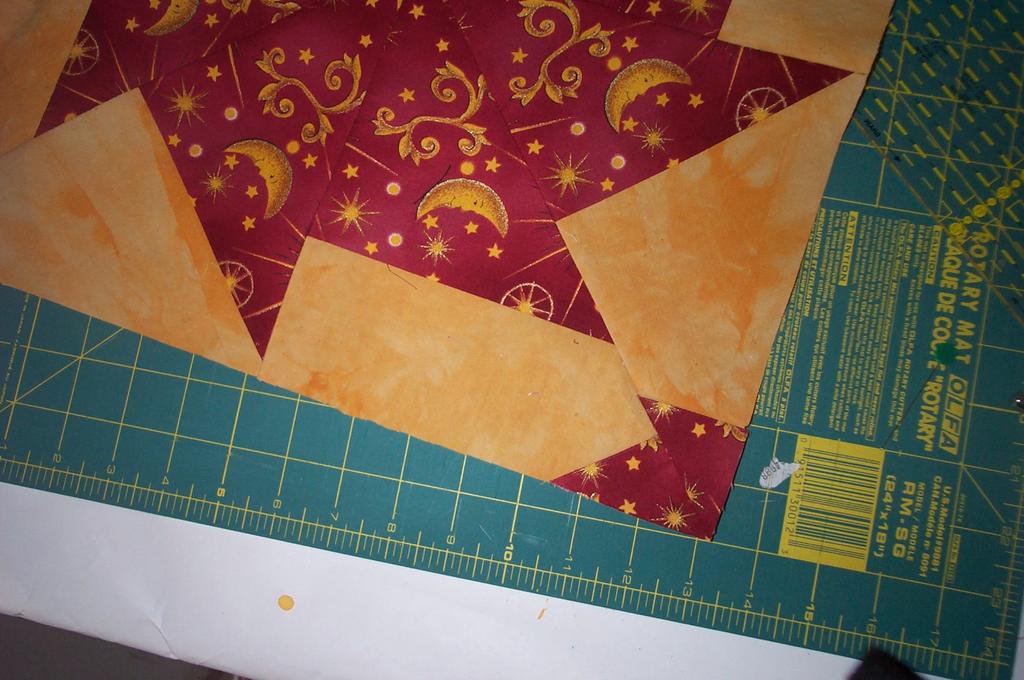
I bought all new fabric for the stars. Then I hand dyed the yellow fro the background. I have to thank Heidi Hunter of Runs With Scissors (you can see her work at 
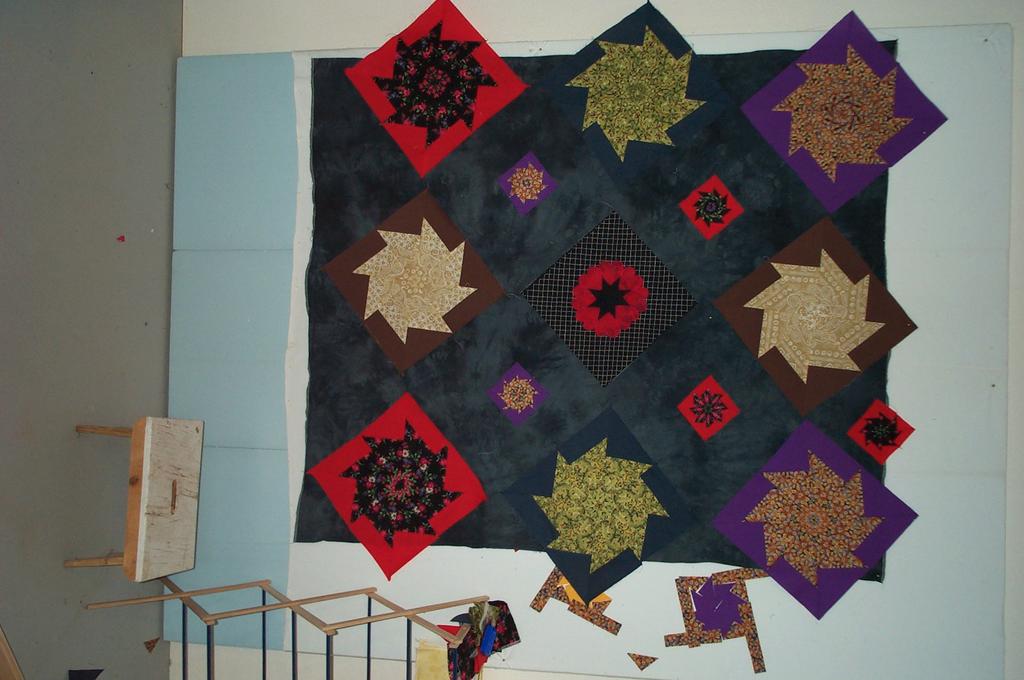
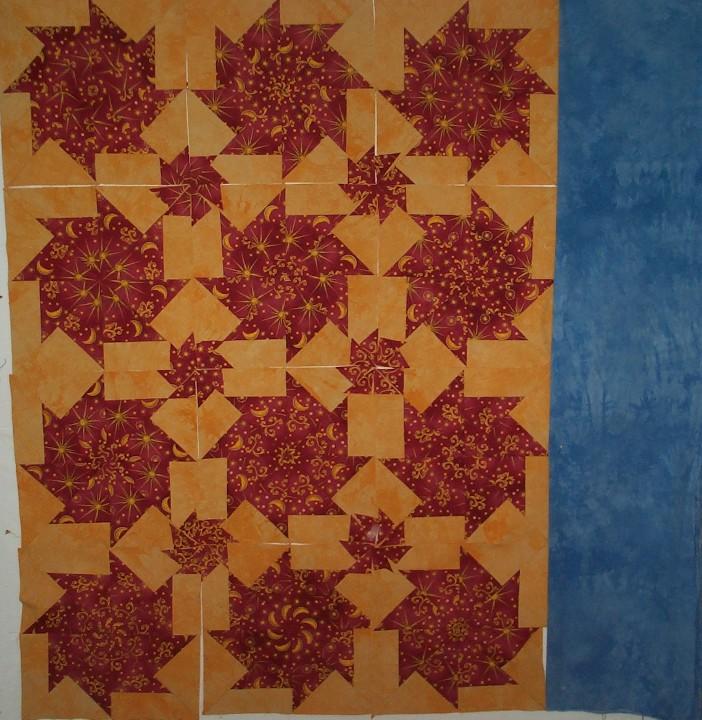
www.runswithscissors.ca ) for introducing me to this type of dyeing. As she said, it's addictive. All the stars are from the same piece of fabric. I was amazed at the different looks you can get depending on where you cut your original squares for the stars. I have also decided that this blue is too light and I will be using a navy blue that I also hand dyed. Then there will be a border of the red fabric. I am not sure if I will want a narrow yellow border as well, between the blue and red ones. I also have to measure it to see if I have enough squuares to make it a queen size. This one will probably be quilted all in one piece because the small stars between the large ones will make it impossible or at least very difficult to do in sections. Now I want the Pfaff Inspira Quilting Frame. You put your machine on it and move the machine over the quilt. It's less money than a long arm machine, so maybe that's the next big purchase!
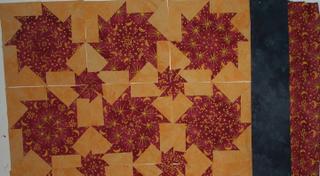
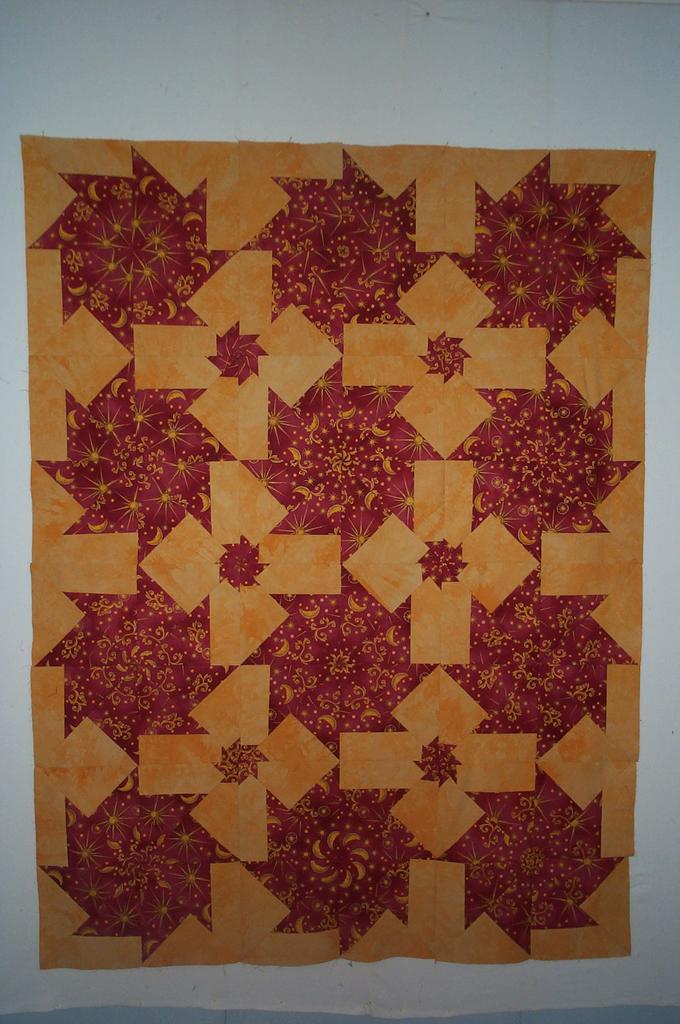
This is the look so far. The red border will be wider and I think a yellow border between the blue and red. The next big decision is the quilting. I'm considering some gold stars or moons on the blue border. As for the main part, I will be somewhat constrained by having to do it all in one piece, unless I can figure out how to do it in sections. I'd like to stipple the yellow part or make curving lines on the red stars to sort of follow the swirl of the shape. They say a quilt has three big decisions - the pattren, the fabric and the quilting, all equally important. Time for the third one!

My next attempt is also a quilt from The Joy of Quilting. It is called Breakfast in Bed. The one in the book has a green border and multi-colored nine patch squares. I opted for dark brown fabric that I think is called Fossil Fern and autumn colours for the squares. I am very happy with the colours again with fabric from The Quilter's Jewel. This time, because of the diagonal lines, I decided to machine quilt it in one piece. It was quite a challenge getting the entire queen sized quilt through my machine on the middle rows but got easier as I progressed toward the outside. There is a fairly complex pattern on the border taken from a template. The back is a cream and brown print of oak leaves and acorns that goes really well with the autumn theme on the front. As you can see, Robin enjoys their new quilt.

Now the third quilt. I used a pattern from The Joy of Quilting by Hanson and Hickey. It is called Butterflies at the Crossroads. Theirs was pink but I decided to go with blue. Once again I purchased my fabrics from Quilter' Jewel in Morden (along with a lot of free advice). The pattern was a lot of fun to do and then I decided to try stipple stitch around the butterflies. That was going fairly well on my Husqvarna and in the middle of it I upgraded to a Pfaff. I couldn't get the hang of doing the stipple on it. I found out later that there is a half way position on the presser foot lever which makes it sooooo simple. As a result, my stippling is not what I'd like it to be. I also outlined the butterflies with stitching. I used a template to stitch a design on the border. The back is a dark blue flowered fabric. This one is also machine quilted in sections and joined together with covering strips.
I think it goes well with Sandy and Christine's old fashioned bed.

Now this is my second quilt. Somewhat better, partially because I went with Bali Batiks for the fabric. How can you miss with those colours? It is a queen size and the back is navy blue with a narrow border of the rainbow colors. I machine quilted it in three pieces and then sewed them together with a covering strip. This one is also stitched in the ditch which is nice because you don't have to do all that marking. I was quite satisfied with this one and have to thank the ladies at The Quilter's Jewel in Morden for suggesting Rail Fence as an easy pattern to start on. I also want to thank Marcel for helping with the layout of all those rainbow squares. I was ready to try for a random look but this is much better. He also designed the heart square in the middle.